Saturday, November 27, 2010

Eset nod32 id, Eset Smart Security update, ESS username and password, eset nod32 keys for version 3,version 4 update 5206, 5207, 5208, 5209, NOD32 latest escalation ID [27 November 2010]

9 comments

Username: EAV-38564017
Password: bjauu2n5ba
For versions: ESS / EAV

Username: EAV-38564018
Password: nrh4usnb3p
For versions: ESS / EAV

Username: EAV-38564020
Password: udhxnm224j
For versions: ESS / EAV

Username: EAV-38562232
Password: dnebe8pn78
For versions: ESS / EAV

Username: EAV-38390693
Password: cck22mupv4
For versions: EAV
Expiry :2011 -05-30

Username: EAV-38390781
Password: jx6sxnen7p
For versions: EAV
Expiry :2011 -05-30

Username: EAV-38390620
Password: ha8s7juef4
For versions: EAV
Expiry :2011 -05-30

Username: EAV-38381248
Password: 8bj4unhtdh
For versions: EAV
Expiry :2011 -05-30

Username: EAV-38381263
Password: t3d4sudtfa
For versions: EAV
Expiry :2011 -05-30

Username: EAV-38381245
Password: neb3347xm8
For versions: EAV
Expiry :2011 -05-30

Monday, November 22, 2010

The Coolest Adobe Photoshop Effect 2010 Tutorials for AP CS 3, 4, and 5

3 comments
Inilah Tutorial Pembuatan Efek Photoshop Paling Keren. Untuk versi Adobe Photoshop yang digunakan bisa Adobe Photoshop CS 3, CS 4 dan CS 5.
Tutorial : Stop Haunt Me Every Day [ SHMED ]


Step 1
In Photoshop, open girl_portrait. jpg from the right (or the cover CD on the magazine). Create a new adjustment layer, and select the Levels (Cmd/ Ctrl + L). Set the Output Level white to 130.


Step 2
Open neon lines_1.jpg, and use the Hue/ Saturation controls to make it black and white. Use the Rectangular Marquee tool to select one of the lines.


Step 3
Using the Move tool (V), drag this selection to girl_portrait.jpg. Change the blending options to Screen. Transform the layer using Cmd/Ctrl + T, and start to rotate it. Right-click (Cmd + click) to choose the Warp tool.
Step 4
Now you’ll see a six-section grid section on the layer, which allows you to move every section or every point. Let’s move it so it matches the one seen here. Click Enter when done, and add a layer mask onto the layer. Start brushing the layer mask, by using black to erase. For a smooth effect, try setting the Brush Opacity to 10 per cent.


Step 5
Duplicate the latest layer by hitting Alt+Cmd/Ctrl+J. Start painting the layer mask by using black to erase, again setting the brush opacity very low. Select both layers and merge them (Cmd/Ctrl+E); don’t be surprised by the black areas. Change the blending options to Linear Dodge and repeat this until the girl is entirely outlined.


Step 6
Still using the same selection from neon lines_1.jpg, start warping again, using this image as an example, using the warping position to trace the detail on the ear. Duplicate this layer, place the shading of the ear and start warping again.


Step 7
Now for the hair. Import the selection from neon lines_1.jpg again, change the blending options to Screen and try warping it so that it looks like the above right image. Use the Eraser tool to take out any unwanted lines. Duplicate the layer – we’ll still need this layer for another part of the hair. Start warping around this layer to fill in the hair. 


Step 8
Open neon lines_2.jpg and make a new selection (see Step 02) to fill the body section. Don’t forget to set the blending option to Screen, and start warping again around this layer. On this layer, add a layer mask to erase unwanted sections of the image.


Step 9
Duplicate the layer (Cmd/Ctrl + J) and start warping once again. Repeat this process until the black areas have been reduced. Select the layer on the body section and merge the layers. Layer mask to erase unwanted sections, and set the layer’s opacity to 70 per cent.


 Step 10
Let’s fill in the face. Return to neon lines_2.jpg and make a different selection. Copy this into the main image over the face and start warping again, starting around the nose. Duplicate the layer, move it to the side slightly and continue warping. Merge the layers.


Step 11
Now it’s time to start adding colour. Merge all of the warp layers together (not forgetting to set the blend mode to Screen). Add an adjustment layer, selecting Gradient. Let’s set the gradient from dark blue to bright blue, set Style to Linear and Angle to 180°. Make another Adjustment Gradient, this time merging from medium green to bright green.


Step 12
Customize the colour by making individual adjustment curves. Adjust the Red, Green and Blue channels individually, rather than adjusting the RGB marker.

Step 13
To create the particle effect, make a selection from neon lines_2.jpg and start warping outside the figure. Open neon lines_3.jpg and make a selection; place this over the girl’s hand. I also added some particle effects on the final images, on a new layer, using the Brush tool. Set the brush’s Tip Shape, check the Shape Dynamics and set the Size Jitter to 100 per cent. Check the Scattering, and set Scatter to 1,000 per cent. Now start brushing the layer in smooth lines, varying the size of the brush. When you’ve finished brushing, add a mask to erase unwanted particles.


The Final Result


Saturday, November 20, 2010

How to Upgrade Firmware Novatel Merlin XU870 3G HSDPA 3.6 ExpressCard Modem to 7.2 Mbps Support (Updated)

96 comments

7.2 Mbps support !
(for your Novatel Wireless Merlin XU-870 or your DELL Wireless 5510)

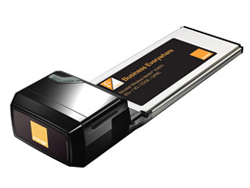
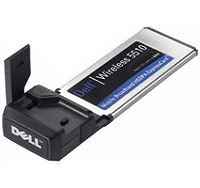
Novatel Merlin XU870 and DELL Wireless 5510

What do my tutorial for you ?
> Add the 7.2 Mbps support for your Novatel Wireless Merlin XU-870 or your DELL Wireless 5510 card
> Use your DELL card on a x64 bits laptop!

History
The 7.2 Mbps firmware for the XU-870 (or DELL Wireless 5510) was very hard to find! I spent many nights googling the web to find it. After find this firmware I was disappointed because the Novatel Wireless Merlin updater doesn't want to flash my DELL branded card. So I decided to find a way to update my fuc**g 3G card. If you have an x64 laptop and a DELL card I think you will be happy to know that DELL don't provide ANY 64 bits drivers (One more reason to debrand you DELL card!)

For information :
Making bad operations on your card can brick your device!
I am not responsible of your ACTS!

>How-to upgrade your XU-870 to 7.2 Mbps?
>How-to upgrade your DELL Wireless 5510 to 7.2 Mbps ?
>Donate

Upgrading the Merlin XU-870
Upgrading your Novatel Wireless Merlin XU-87 branded 3G card is as easy as download this file :-) :
NVTL_PUU_800_FW101.9.00_PkgB.exe

Upgrading the DELL Wireless 5510 to 7.2 Mbps
For a XU_870 you can use directly the 101.9.00 firmware updater but for the DELL there is no way! We can't upgrade the card with the same firmware update! So we use the old firmware updater (version 9.5.03) to flash the new 7.2 Mbps firmware. For this we have to swap two files during the upgrade
processes.

Upgrading a XU-870 branded by DELL is more complicated. You have to follow this tutorial to flash and debrand your DELL Card. After this, your card will be recognize like an Novatel Wiresll Merlin XU-870 card.

Download the following file :
NVTL__FUU_800_9.5.03_S1.exe
The original firmware installer for Merlin XU-870 ver 9.5.03
U800.nvtb
The extracted 7.2 Mbps firmware
XU870.cache
The configuration file
The Novatel Drivers
The Novatel Wireless Merlin drivers

This is step by step to upgrade your firmware:

1. Download and install first the Novatel driver for the card.
You can download for free newest software and driver MobiLink Connection Manager and Driver Installer for
Windows Vista and Windows 7, 32 & 64 bit, (because link at the official website has been removed). Download MobiLink Manager Driver Novatel Merlin XU870.rar on below
rapidshare.com/files/4041567138.
 

2. Download Upgrade 7.2 Mbps Toolkit . Launch the NVTL__FUU_800_9.5.03_S1.exe installer, you will see this screen (sorry I'am French as you can see on the update's screenshot)


Don't click on "Next"
3. Go to the temp folder (On my Windows Vista : C:\Windows\temp). You will see an "U800.nvtb", this is the old firmware. So replace the 10,5 MB "U800.nvtb" files by the 12,9 MB "U800.nvtb" files you've downloaded from this website.


4. Now click on "I Accept" and "Next"


The disclaimer screen

5. The modem is controlled


6. At this point the modem's configuration is saved


7. At this point the new firmware is written on the 3G card.


In the temp folder you will see a new *.cache file. Replace the "*.cache" files by the "XU870.cache" files you've downloaded from this website. So take my *.cache file and rename it with the same name than the old one (here : L7101106001991_001.cache).


The configuration file contain all information about the device except IMEI. So The branded information are stored in this file. So restoring my *.cache file will debrand your DELL card to be an original Merlin XU-870

8. At this point the configuration is restored on the card


Restoring modem's configuration... Please Wait

9. The modem is restarted and the wizard is ended


The card is updated !

After this your laptop will recognize your DELL Wireless 5510 as a Novatel XU870 card

10. Reflash the card a second time (restart at number 2 of the tutorial).

That's ALL !

If your are happy with my work you can donate :


Thursday, November 18, 2010

Eset nod32 id, Eset Smart Security, ESS username and password, eset nod32 keys for version 3,version 4 [ 16 November, 2010]

1 comments

Username: EAV-38176023
Password: v86cc8rj22
For versions: ESS / EAV

Username: EAV-38176026
Password: f5dd6u4era
For versions: ESS / EAV

Username: EAV-38176029
Password: 3xkfxfcchj
For versions: ESS / EAV

Username: EAV-38176032
Password: ksths5n8at
For versions: ESS / EAV

Username: EAV-38176043
Password: e3fk4tvmjf
For versions: ESS / EAV

Username: EAV-38176047
Password: tcfcphj3m6
For versions: ESS / EAV

Username: EAV-38009869
Password: bxknpu8ahf
For versions: EAV
Expiry :2011 -05-20

Username: EAV-38011018
Password: crn2m7c5nk
For versions: EAV
Expiry :2011 -05-20

Username: EAV-38009772
Password: vx5mfbep7r
For versions: EAV
Expiry :2011 -05-20

Wednesday, November 17, 2010

Hotel, Wisma, Penginapan Murah dan Recommended di Dago, Cihampelas dan Pusat Kota Bandung

7 comments
Melanjutkan postingan Hotel, Wisma, Penginapan Murah di Dago, Bandung, kali ini saya berikan daftar penginapan, wisma, hotel murah di pusat kota Bandung yang lokasinya mudah diakses, terutama bagi anda dari luar kota dan ingin menginap di Bandung.

Sekedar informasi bahwa Bandung ini luas, tidak semua hotel berada di daerah pusat perbelanjaan (keramaian), oleh karena itu yang saya tampilkan berikut adalah hotel yang recommended, mudah diakses, dilalui jalur angkot dan tentunya murah meriah.

Wisma Dago
Jl. Ciung Wanara 16 Cibeunying, Bandung 40135, West Java, Indonesia
Telp. (022) 2501356


  • Lokasi wisma sebelah timur Masjid Salman ITB, 20 meter depan parkir SR Kampus ITB (Institut Teknologi Bandung) Jl. Ganesha.
  • Tempat penginapan favorit keluarga mahasiswa ITB, terutama musim wisuda, mesti booking jauh-jauh hari. H-30 wisuda biasanya udah penuh.
  • Dekat dari pusat FO Jl. Juanda (jalan kaki 50 meter), Rumah Sakit Borromeus, Kebun Binatang Bandung, tempat makan Gelap Nyawang, dll
  • Lingkungan sekitar hotel sepi, cocok sebagai tempat istirahat setelah seharian berbelanja.
  • Room rates mulai 325 ribu.

Bumi Sawunggaling Hotel
Jl. Sawunggaling No.13, Bandung Kota, Indonesia


  • Lokasi di depan Warung Steak, BLCI Jl. Sawunggaling
  • Lingkungan sekitar hotel cukup sepi kalau malam hari.
  • 200 meter dari pusat FO (Factory Outlet) Dago Jalan Ir.Juanda,
  • 100 meter dari Pusat Belanja Balubur, Jalan Layang Pasopati dan Gedung Rektorat ITB
  • Diskon 10% bagi mahasiswa ITB dengan menunjukkan KTM
  • Bagi yang mau wisuda, sebaiknya booking H-30 untuk menghindari full booked.
Fasilitas : Penyejuk udara, televisi, bathtub, shower, balkon/teras, TV satelit/kabel

Room Rates per night (Breakfast Included) :
* Standard Single Rp 320.000
* Superior Rp 400.000
* Pitaloka/Bosscha/Deluxe Rp 450.000
* Extra Bed Rp 120.000


Wisma Pertamina Sawunggaling
Jl. Sawunggaling no 14, Bandung
Telp : 022-4231897 atau 021-3860994

  • Wisma milik Pertamina, tapi disewakan untuk umum.
  • Lokasi di seberang Hotel Bumi Sawunggaling.
  • Ada tempat parkir.
  • Bangunan lama, namun interior rapi dan bersih.
Rates (Weekdays):
Dandanggula      Rp 240.000
Kinanti              Rp 250.000
Asmarandana     Rp 260.000
Sinom                Rp 315.000
Gambuh             Rp 295.000
Extra Bed           Rp 80.000
Extraperson        Rp 65.000

Harga Weekend selisih 20-60rb 
Room Driver        Rp 150.000
Balairung            Rp 750.000 

Room Facilities:
TV Colour 21", Hot & Cold Water, AC, Welcome Drink, TV Cable with 55 Channel
Check in time 13.00 pm
Check out time 12.00 pm
Include 21% service & tax and option breakfast

Hotel Cihampelas 1
Jl. Cihampelas 240, Cihampelas, Bandung, Indonesia


  • Terletak di jalan Cihampelas, pusat fashion, pernak-pernik, distro, dll.
  • 400 meter dari Cihampelas Walk (Ciwalk) One Stop Shopping Center.
  • Gratis transport dari/ke Bandara Husein Sastranegara dan Stasiun Kereta Api Bandung
  • Merupakan hotel termurah di Jl. Cihampelas (dibanding Hotel Amaris, Hotel Sensa Ciwalk, Aston Tropicana, Hotel Puma)
  • Karena lokasi di daerah pertokoan, lalu lintas di depan hotel sering macet.
Fasilitas untuk semua kamar :

* TV Kabel
* Coffee/ tea maker
* Mini-bar
* Private toilet and bath
* Shower
* Telepon

Tarif kamar per malam (termasuk sarapan) :
Standard Rp 180.000
Deluxe (AC) Rp 300.000
Super Deluxe (AC) Rp 350.000


Hotel Cihampelas 2
Jl. Cihampelas 222, Cihampelas, Bandung, Indonesia


  • Bangunan lebih besar dan baru dari Hotel Cihampelas 1.
  • Terletak di jalan Cihampelas, pusat belanja pakaian, pernak-pernik, distro, dll.
  • 300 meter dari Cihampelas Walk (Ciwalk) One Stop Shopping Center.
  • Gratis transport dari/ke Bandara Husein Sastranegara dan Stasiun Kereta Api Bandung
Facility :
* Air-conditioning
* Cable television
* Internet connection
* Private toilet and shower with hot and cold water
* Telephone

Tarif kamar (termasuk makan pagi) :
Standard Room Rp 250.000
Deluxe Room Rp 250.000
Superior Room Rp 280.000
Suite Room (Refrigerator) Rp 350.000
Family Room Rp 425.000


Gandasari Hotel
Jl. Seram No. 3, Bandung City, Bandung, Indonesia


  • Lokasi di belakang/timur BIP (Bandung Indah Plaza)
  • Dekat Jl. Martadinata, pusat FO, Riau Junction, Gramedia, BEC (Bandung Electronic Center), Kantor Wali Kota Bandung, Gedung Bank Indonesia, dll
Fasilitas:
* Free WiFi Internet Access
* Individual Air Conditioning Room
* Hot & Cold Shower
* Multi Channel Television with Cable TV
* Bathroom Amenities
* Phone Extension
* Welcome Drink
* Mini Bar
* Room inclusive Breakfast
* Laundry Service
* CASPEA Resto & Cafe
* Tour & Travel Service
* 24 Hrs. Front Office, Houskeeping & Security Service
* Meeting Rooms & Meeting Packages

Tarif kamar :
ROSE Room (Standard Twin Bed) Rp. 375.000,-
LILY Room (Superior) Rp. 400.000,-
BOUGENVILLE Room (Deluxe) Rp. 425.000,-
AMARYLLIS Room (Executive) Rp. 450.000,-
ALAMANDA Room (Family) Rp. 900.000,-
Extra Bed Rp. 85.000,-
Tarif diatas berlaku weekday, untuk weekend semua rates ditambah 50 ribu

"Tips : Saya sarankan lakukan pemesanan/reservasi online kamar hotel melalui Agoda.com / Agoda.web.id agar mendapat harga yang lebih murah bahkan paling murah dibanding reservasi langsung atau melalui situs resminya.
Tidak percaya? Bandingkan!"


Selanjutnya Penginapan, Guest House, Hotel Paling Murah di Kota Bandung