If you are running Windows 7 and experiencing slow application response times while running many programs simultaneously, then you most probably need to increase the file systemmemory cache size. Increasing the file system memory cache size often leads to applications running smoother and faster. Below I have explained how you can increase this cache size in Windows 7.
Note: You should go ahead with this procedure if you have a sufficient amount of RAM(computer memory) installed on your computer.
THROUGH THE COMMAND LINE
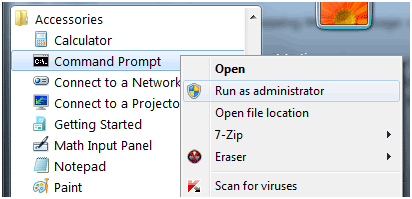
Firstly you need to be logged in as the Administrator. If you are logged in as any other user, then head on over the Command Prompt shortcut in the Start Menu, right-click on it and choose the “Run as Administrator” option.
In the command prompt, you can enter the following line to increase the cache size (to increase the limit of paged pool memory):
fsutil behavior set memoryusage 2
To restore the setting, the following line should be entered in the command prompt:
fsutil behavior set memoryusage 1
THROUGH THE SYSTEM REGISTRY
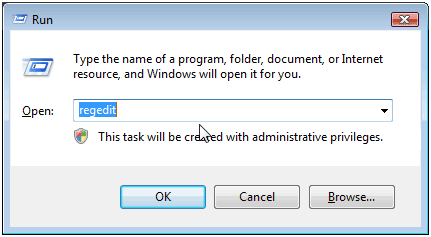
Access the Run box by pressing the Windows Logo button on your keyboard and the R key. Type in “regedit”
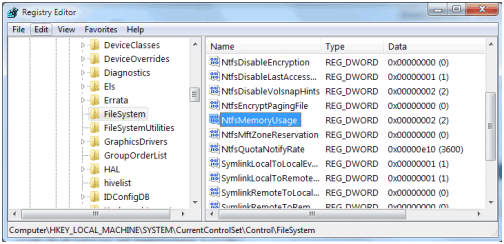
You will see a window with folder paths on the left. Navigate to the following path:
HKEY_LOCAL_MACHINE \ SYSTEM \ CurrentControlSet \ Control \ FileSystem
In the right pane, locate the entry titled “NtfsMemoryUsage.”
You can set three values to this entry: 0 for not set, 1 for default, and 2 for increased.
After you have increased the cache either through command prompt or system registry, restart your computer and test if there are any considerable gains in system speed. Hopefully you will experience a noticeable difference but if you do not, it would be a good idea to revert your cache settings.


